How to Clean Mould Off Walls
Mould on walls is a common problem in Sydney homes, particularly during humid months. While small surface patches can often be cleaned safely at home, understanding the correct techniques and safety precautions is essential. This comprehensive guide explains when DIY cleaning is appropriate, which methods work best, and when professional intervention becomes necessary.
Understanding Wall Mould Before You Begin
Before attempting any cleaning, it is crucial to understand what you are dealing with. Mould on walls typically appears as black, green, or grey patches and thrives in areas with poor ventilation, high humidity, or water damage. The visible growth is only part of the problem; mould often penetrates into porous materials like drywall and plaster.
The key factor determining whether DIY cleaning is appropriate is the size and location of the affected area. Small patches under one square metre on non-porous painted surfaces can usually be handled safely at home. However, mould covering larger areas, recurring growth, or colonies within wall cavities require professional assessment and treatment.
Identifying the moisture source is equally important as removing the visible mould. Without addressing the underlying cause, whether it is a leak, condensation, or inadequate ventilation, the mould will return within weeks of cleaning.
- Mould covering less than 1 square metre may be suitable for DIY cleaning
- Patches on porous surfaces like unpainted drywall require professional treatment
- Recurring mould in the same location indicates an unresolved moisture problem
- Musty odours suggest hidden mould within wall cavities beyond visible growth
Essential Safety Precautions
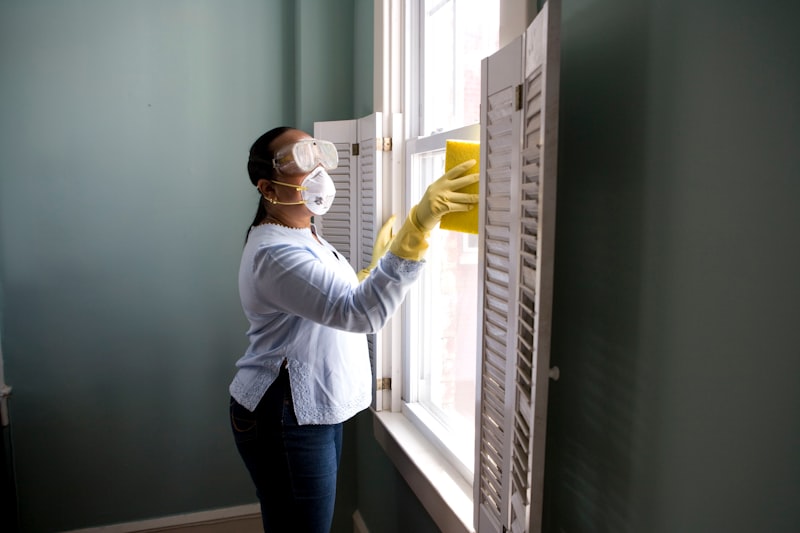
Mould spores become airborne when disturbed, creating respiratory hazards. Before starting any cleaning, proper personal protective equipment is essential. At minimum, wear an N95 respirator mask, protective goggles, and disposable gloves. Long sleeves and pants protect skin from contact with mould and cleaning agents.
Ensure the room is well ventilated by opening windows and using fans to direct airflow outside, not into other parts of the house. Seal doorways to adjoining rooms with plastic sheeting and tape to prevent spore migration. Children, elderly family members, and anyone with respiratory conditions or compromised immunity should stay away from the area during cleaning and for several hours afterward.
Never mix cleaning products, particularly bleach with ammonia-based cleaners, as this creates toxic fumes. Keep cleaning solutions away from skin and eyes, and work in short sessions rather than prolonged exposure to avoid fatigue and reduced vigilance with safety measures.
People with asthma, allergies, or existing respiratory conditions should not attempt mould cleaning themselves. The disturbance of spores during cleaning can trigger severe reactions even with protective equipment.
Effective Cleaning Solutions and Methods
Several cleaning solutions prove effective against surface mould on painted walls. White vinegar is a natural option that kills many mould species without harsh fumes. Apply undiluted white vinegar to the affected area using a spray bottle, leave it for one hour, then scrub with a brush and wipe clean with water.
For more stubborn growth, a diluted bleach solution (one part bleach to ten parts water) is highly effective on non-porous surfaces. However, bleach does not penetrate porous materials and may only lighten the appearance of mould without killing colonies beneath the surface. Commercial mould-specific cleaners often contain both antimicrobial agents and surfactants that improve penetration.
The cleaning technique matters as much as the product. Spray the solution onto the mould rather than wiping it first, as this prevents spreading spores. Allow the solution adequate contact time (usually 10-15 minutes for most products). Use a stiff brush for scrubbing, working from the edges toward the centre. Rinse with clean water and dry thoroughly with disposable cloths.
- White vinegar solution: safe, effective, minimal fumes, suitable for regular maintenance
- Diluted bleach solution: powerful but only effective on non-porous painted surfaces
- Borax solution: less toxic alternative, mix 1 cup borax per gallon of water
- Commercial mould removers: purpose-designed formulations with improved penetration
- Hydrogen peroxide 3%: effective and safer than bleach for most applications
Step-by-Step Cleaning Process
Begin by preparing the work area. Remove furniture, curtains, and any items within two metres of the affected wall. Cover flooring with disposable plastic sheeting. Put on all protective equipment before disturbing the mould. Have a waste bag ready for disposing of contaminated materials.
Apply your chosen cleaning solution generously to the mouldy area and allow it to sit for the recommended contact time. This is critical because simply wiping mould spreads spores rather than eliminating them. After the solution has worked, scrub the area using a stiff-bristled brush, working methodically to cover the entire affected section.
Rinse the cleaned area with plain water using a fresh cloth, changing the water frequently. Dry the wall thoroughly using clean disposable towels or allow it to air dry with strong ventilation. Seal all used cloths, protective equipment, and debris in a plastic bag before disposal. Finally, vacuum the surrounding area with a HEPA-filter vacuum to capture any spores that may have settled on nearby surfaces.
Addressing the Underlying Moisture Problem
Cleaning removes visible mould, but preventing recurrence requires identifying and fixing the moisture source. Common culprits in Sydney homes include inadequate bathroom and kitchen ventilation, leaking pipes behind walls, roof leaks, blocked gutters, and rising damp in older properties.
Inspect the cleaned area and surrounding structure for signs of water intrusion. Check for condensation on windows, water stains on ceilings above or below the affected wall, and dampness in adjacent rooms. Feel the wall for cold spots that may indicate poor insulation leading to condensation issues.
Simple fixes include improving ventilation by using exhaust fans during and after showers, opening windows regularly to reduce indoor humidity, and using dehumidifiers in chronically damp rooms. More significant issues like leaking pipes, damaged weatherproofing, or structural problems require professional repair before mould treatment will have lasting effect.
- Run bathroom exhaust fans for at least 20 minutes after showering
- Maintain indoor relative humidity below 55% using dehumidifiers if necessary
- Repair leaking taps, pipes, and roof damage promptly
- Ensure gutters and downpipes direct water away from the building foundation
- Consider installing vapour barriers in chronically damp areas
Mould that returns within weeks of cleaning is a clear sign that the moisture source has not been properly addressed. Repeated cleaning without fixing the underlying problem is ineffective and potentially harmful due to ongoing spore exposure.
When Professional Intervention is Necessary
DIY cleaning has clear limitations. If mould covers more than one square metre, has penetrated into drywall or plaster, or keeps returning after cleaning, professional treatment is necessary. Similarly, mould in HVAC systems, inside wall cavities, or following flooding requires specialist equipment and expertise.
Professional mould removal goes beyond surface cleaning. It includes forensic inspection to identify all affected areas including hidden colonies, moisture mapping to locate the source of water intrusion, containment to prevent spore spread during treatment, and the application of hospital-grade antimicrobial agents that penetrate porous materials.
Nanotise employs advanced detection technology to locate hidden mould that would be missed in a standard visual inspection. Our TGA-registered treatments eliminate active colonies and our exclusive CRX nanotechnology barrier provides long-term protection against recurrence. With over 16 years of experience treating Sydney properties, our senior consultants design treatment plans tailored to the specific conditions of your home.
Key Takeaways
- Small surface mould patches under 1 square metre on non-porous walls can be cleaned at home with proper safety equipment and techniques
- Essential safety gear includes N95 respirator masks, goggles, and gloves to protect against airborne spores during cleaning
- Effective cleaning solutions include white vinegar, diluted bleach, and commercial mould removers, each with specific advantages for different situations
- Addressing the underlying moisture source is critical; without fixing leaks and improving ventilation, mould will return regardless of cleaning efforts
- Professional treatment is necessary for mould covering large areas, within wall cavities, or recurring growth despite proper DIY cleaning
- Prevention through humidity control, improved ventilation, and prompt repair of water damage is more effective than repeated cleaning
Frequently Asked Questions
Bleach is effective only on non-porous surfaces like painted walls and tiles. It does not penetrate porous materials such as drywall, wood, or plaster, and may only bleach the surface appearance while the mould continues growing beneath. For porous materials, vinegar or commercial mould removers with penetrating agents are more effective.
If the moisture source is not addressed, mould can return within 1-3 weeks. Surface cleaning removes visible growth but does not eliminate spores embedded in porous materials or address the conditions that allowed mould to establish. Proper moisture control is essential for lasting results.
Painting over mould without proper treatment is ineffective and potentially problematic. The mould will continue growing beneath the paint, eventually breaking through and creating bubbling or peeling. Mould must be properly cleaned and the underlying moisture issue resolved before repainting. Using mould-resistant paint provides additional protection but is not a substitute for proper remediation.
Recurring mould indicates an ongoing moisture problem that has not been identified or fixed. Common causes include hidden leaks within walls, condensation due to poor insulation, or inadequate ventilation. Professional inspection with moisture detection equipment can identify the source and ensure proper treatment of both the mould and its underlying cause.
Mould Removal Sydney
Professional mould removal services across Sydney using TGA-registered treatments and nanotechnology barrier protection.
Learn MoreResidential Mould Removal
Specialist mould removal for Sydney homes — from surface treatment to full cavity remediation.
Learn MoreLiving Areas Mould Removal
Comprehensive mould removal from living rooms, bedrooms, and common areas affecting indoor air quality.
Learn MoreConcerned About Mould?
Our senior consultants provide expert assessments and tailored treatment plans for Sydney homes and businesses. 16+ years of experience.